Remotely reading out the DJ9PK reciprocal frequency counter
Last change: 30.03.2019
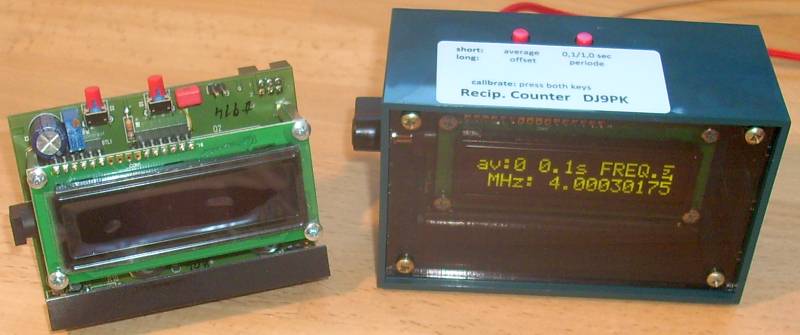
Theo DJ9PK has designed an excellent
frequency counter which works according to the reciprocal principle and utilizes
interpolation.
The counter was published in CQ-DL Vol 1-2017, pp. 14ff under the title "Ein
moderner Zähler".
Theo offers the counter as a ready to use module with or without enclusure.
The pdf-documentation can be found here. The module can be ordered here.
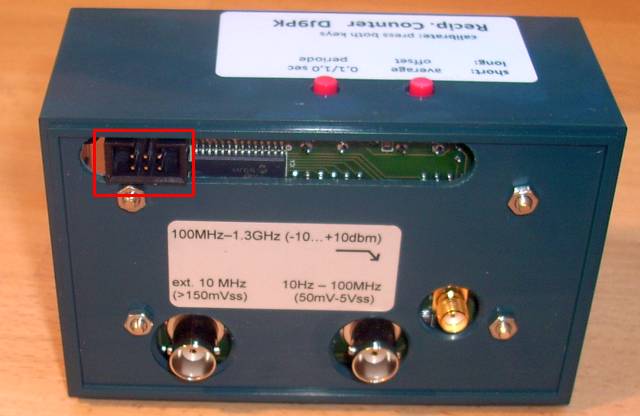
The counter has an interface socket as can be seen below inside the red rectangle.
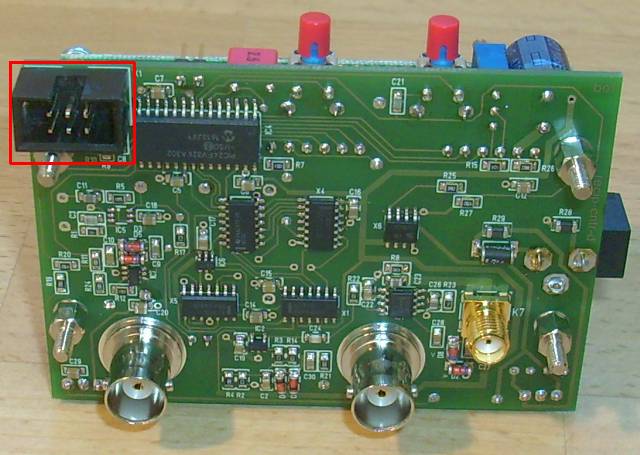
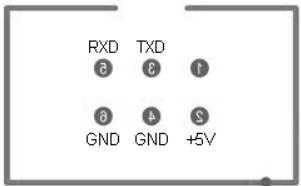
Theo has implemented his firmware such that the counter continuously outputs the measurement result as a serial
stream on pin 3 of the interface socket.
The serial data format is 9600 bits per second, 8 data bits, 1 stop bit, no
parity. Pin 5 receives serial commands to remote-control the counter, e.g. in
order to change prescaler settings or to trigger single measurements. The
command structure is documented in Theo's manual.
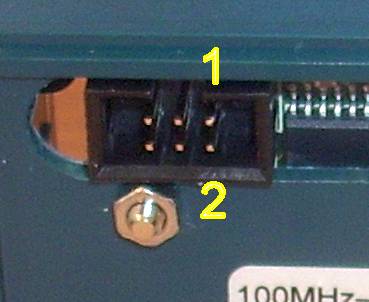
The programming socket also has a
ground connection on pins 4 and 6 and a +5V connection on pin 2. This offers the
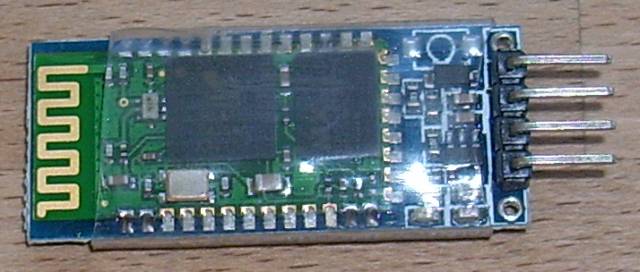
possibility to directly connect a low cost Bluetooth serial port module like the
Olimex HC-06, which is widely available on breakout boards like the one
shown below.
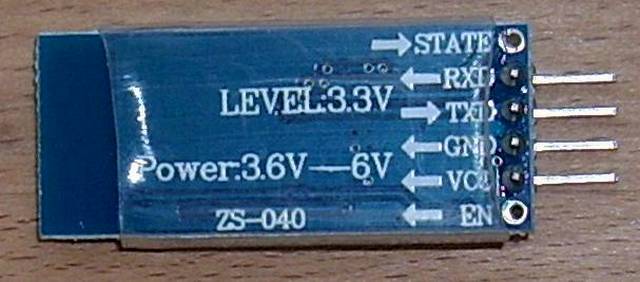
For my experiments I have created a small adapter that allows me to directly plug the HC-06 module onto the counter as can be seen further down. Note, that the counter data output should be connected via a 1kOhm resistor to the HC06-module's RXD input. The resistor is recommended to convert the 5V counter output signal to the 3.3V module signal level.

I have written a Microsoft-Windows software to comfortably read out the data transmitted from the counter and to control the counter with a PC. The software will connect to any serial port, regardless whether native, USB-to-serial or Bluetooth-to-serial.
The software RCounter can be downloaded from here.
If you know the COM-port number the counter is connected to, then you simply select it and press connect. If you do not know the port number, delete any text visible in the port selection box so it is blank and press the connect button. Note, that the software will remember the port for future quicker connects. The success of any attempt to connect can be observed at the blue top bar as can be seen below.
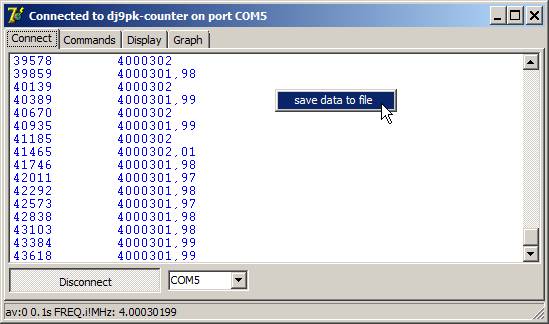
When the counter is sending data, it
will be shown in the bottom status line as sent by the counter. Moreover the
software logs the reception time and extracts the measurement value.
Both, the reception time in milliseconds after connection and the measurement
value will be listed in columns on the white screen as seen above.
The columns of data can be saved to a file by right-clicking the list and selecting the save menu as shown above.
Two data formats are available as shown below.
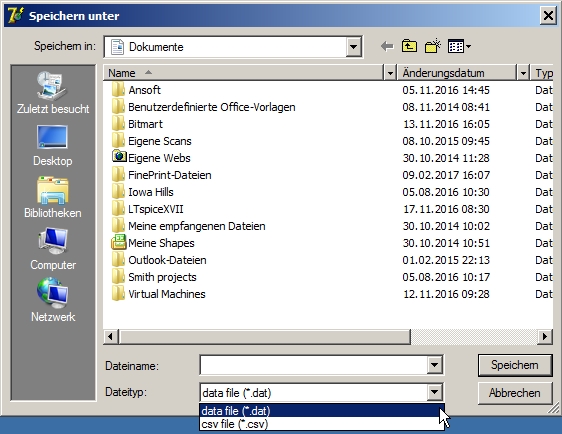
*.dat file format: Numbers are saved with a dot '.' as decimal separator, time and value are separated by a blank.
*.csv file format: Numbers are saved with the country dependent decimal separator provided by Windows (in Europe ','). Time and value are separated by semicolon ';'. This format can be directly read into Excel.
The software's Commands tab allows to send commands to the counter and receive status information:
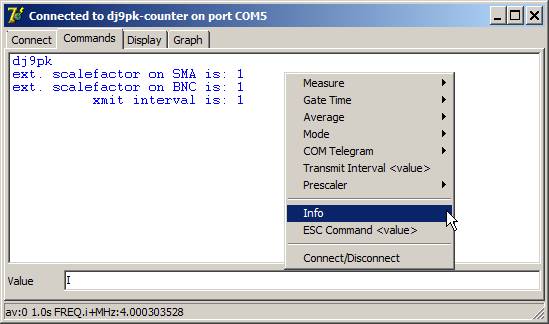
Commands can either be sent using the right-click menu of the white status message panel or by entering the command in the bottom value line and sending it by pressing the return keyboard key. The command structure and syntax is documented in Theo's manual. When using the right-click menu to send commands that require a value (e.g. setting prescaler values), the value has to be entered into the value line before invoking the command. Above example shows the counter's response to the Info command, i.e. the counter identifier (dj9pk), the prescaler factors and the transmit interval.
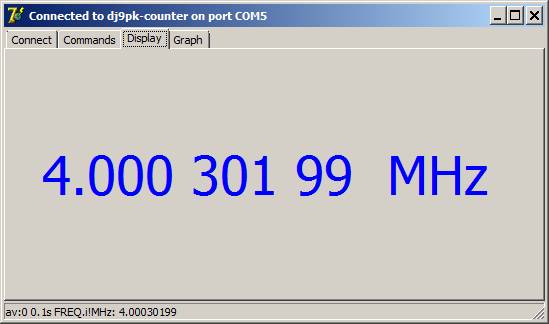
The reading software also includes a scalable value display in the Display tab. This is particularly useful for folks with poor eyesight as the display can be made as large as the computer screen. Tabbing is used for better readability:
All received data will also be plotted on the Graph tab versus the receive time:
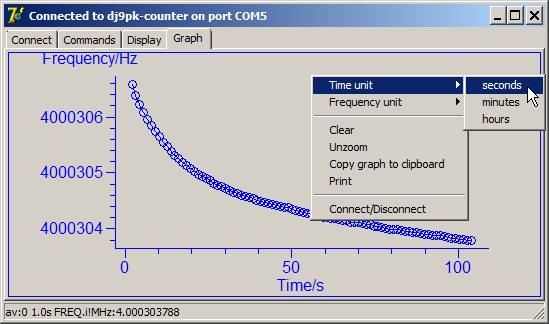
The graph offers a right-click menu with several options:
Time unit: modifies the horizontal time axis unit
Frequency unit: modifies the vertical frequency axis unit
Clear: Clears the graph but doesn't stop the measurement. New data coming in will be plotted starting left again.
Unzoom: One can zoom into the graph by holding the ctrl-key, pressing the left mouse button and drawing a box. Unzoom un-does the zoom.
Copy graph to clipboard
Connect/Disconnect: Connects or disconnects to the serial port like the connect button. Note, that the graph will be cleared upon connect.
Feedback welcome!
73 Tom